Category Archives: Projects - Page 2

OpenCV - UPC Barcode Reader Part 2

In the previous article I explained the basics about the UPC barcode system. In this second part I will show how to read an encoded digit.

UPC Reader

Principle

How are going to decode our image ? That's pretty simple, we perform an horizontal scan of our image.
First of all we read the guard in order to find the smallest width and after we read the 6 left digits, the middle guard again and the 6 right digits. To read a digit we read 7 bits and lookup the corresponding digit in a lookup table. Simple !

Digits encoding

First of all we need to store the left and right encoding of each digit, for this purpose we need a std::map (just one because right-encoding is the bitwise complement of left-encoding). The map associates a binary encoding to the value of the digit.
In C++ you can't directly write a binary value (but you can write an hexadecimal value), so I could have just converted the binary sequence in decimal, but for readability I prefer to express the value directly in binary. After a bit of searching I stumbled upon this handy macro:

#define Ob(x)  ((unsigned)Ob_(0 ## x ## uL))
#define Ob_(x) (x & 1 | x >> 2 & 2 | x >> 4 & 4 | x >> 6 & 8 |		\
	x >> 8 & 16 | x >> 10 & 32 | x >> 12 & 64 | x >> 14 & 128)

To convert the binary sequence 0001101 just write Ob(0001101) !
Here is the code to setup the table:

typedef std::map<unsigned, char> pattern_map;
 
void setup_map(pattern_map& table)
{
  table.insert(std::make_pair(Ob(0001101), 0));
  table.insert(std::make_pair(Ob(0011001), 1));
  table.insert(std::make_pair(Ob(0010011), 2));
  table.insert(std::make_pair(Ob(0111101), 3));
  table.insert(std::make_pair(Ob(0100011), 4));
  table.insert(std::make_pair(Ob(0110001), 5));
  table.insert(std::make_pair(Ob(0101111), 6));
  table.insert(std::make_pair(Ob(0111011), 7));
  table.insert(std::make_pair(Ob(0110111), 8));
  table.insert(std::make_pair(Ob(0001011), 9));
}

Now we need an...

Helper function

We will need a small helper function in order to assist us while reading a digit.
First of all we will use the following typedef, because we will only be using grayscale/B&W images:

typedef cv::Mat_<uchar> Mat;

And the two following define (remember we always invert the colors so bars are white !)

#define SPACE 0
#define BAR 255

In all following functions, the cur variable is the position of our horizontal scan pointer.

The following function is really helpful in order to prevent error from accumulating after reading a bit.

For example left-digits always end with a '1' bit and we always begin with a '0' bit, therefore if after reading a digit we are still on a bar, we need to advance our scan pointer until we reach the beginning of the next digit. Also, if the previous bit is '0', we have gone too far and we need to decrease our scan pointer in order to be perfectly on the boundary between the two digits.
The situation is reversed for right-digits.

void align_boundary(const Mat& img, cv::Point& cur, int begin, int end)
{
  if (img(cur) == end)
  {
    while (img(cur) == end)
      ++cur.x;
  }
  else
  {
    while (img(cur.y, cur.x - 1) == begin)
      --cur.x;
  }
}

Reading a digit

We now have almost everything we need in order to read a digit, we just need an enum indicating if we are reading a left or a right-encoded digit.

enum position
{
  LEFT,
  RIGHT
};
 
int read_digit(const Mat& img, cv::Point& cur, int unit_width,
	       pattern_map& table, int position)
{
  // Read the 7 consecutive bits.
  int pattern[7] = {0, 0, 0, 0, 0, 0, 0};
  for (int i = 0; i < 7; ++i)
  {
    for (int j = 0; j < unit_width; ++j)
    {
      if (img(cur) == 255)
        ++pattern[i];
      ++cur.x;
    }
    // See below for explanation.
    if (pattern[i] == 1 && img(cur) == BAR
	|| pattern[i] == unit_width - 1 && img(cur) == SPACE)
      --cur.x;
  }
 
  // Convert to binary, consider that a bit is set if the number of
  // bars encountered is greater than a threshold.
  int threshold = unit_width / 2;
  unsigned v = 0;
  for (int i = 0; i < 7; ++i)
    v = (v << 1) + (pattern[i] >= threshold);
 
  // Lookup digit value.
  char digit;
  if (position == LEFT)
  {
    digit = table[v];
    align_boundary(img, cur, SPACE, BAR);
  }
  else
  {
    // Bitwise complement (only on the first 7 bits).
    digit = table[~v & Ob(1111111)];
    align_boundary(img, cur, BAR, SPACE);
  }
 
  display(img, cur);
  return digit;
}

After reading a bit we are using a little trick in order to increase accuracy:
- if we have read only 1 bar and it was the last pixel, we are probably reading the following bit, so move backward by one pixel.
- if we have read only bars except the last pixel, we are probably reading the following bit, so move backward by one pixel.
Warning: I assume here that the smallest width is not 1. This trick should scale with the value of the smallest width.

And now read part 3 for complete decoding !

OpenCV - UPC Barcode Reader Part 1

As a school project we are assigned to find and decode barcodes in an image. For this project I will be teaming with Julien Marquegnies. This is the first article of a (perhaps) long serie.
As a first draft, this morning I quickly developed a program to decode UPC barcodes. I used OpenCV for loading and displaying but I don't use any advanced function from the library so the code can be quickly adapted to other use cases.

Universal Product Code

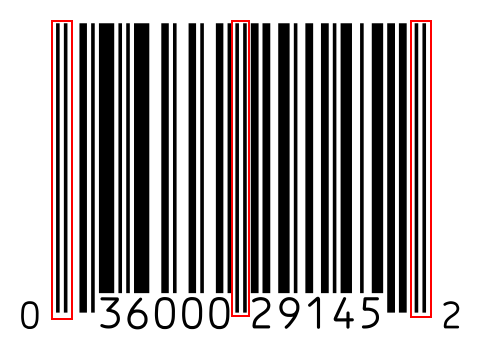
UPC is a standardized type of barcode used for scanning goods in stores. Here is an example of a UPC barcode:


First of all, we need to explain how UPC works.

Quiet Zone

To the left and to the right of the barcode we have a large area of white called the quiet zone. This zone is required to be at least 10 times the width of the smallest bar and is here to facilitate barcode detection, it has no interest for decoding.

Guard patterns

We can notice that the same pattern at the left, at the middle and at the right of our barcode:


This patterns is called the guard. The three occurences of this pattern are called (from left to right) S, M, and E (Start, Middle and End). S and E are encoded with 3 bits and the pattern is bar-space-bar. M is encoded with 5 bits with the pattern space-bar-space-bar-space.

Left and right digits

Between S and M we have the left digits and between M and E we have the right digits. Each digit is encoded on 7 bits, giving a total of 84 bits encoding digits, and 11 bits encoding guards.

Left and right digits are encoded differently: the right encoding scheme is the bitwise complement of the left encoding scheme.

The concept of bits for a visual pattern might be unclear, so let me explain: by reading the guard we have determined the width of the thinnest bar, in order to read a digit we read approximatively 7 * width pixels, at each time, if we encountered a bar the current bit will be 1 and 0 otherwise. The encoding of each digit is presented in the following table:

Digit L-code R-code
0 0001101 1110010
1 0011001 1100110
2 0010011 1101100
3 0111101 1000010
4 0100011 1011100
5 0110001 1001110
6 0101111 1010000
7 0111011 1000100
8 0110111 1001000
9 0001011 1110100

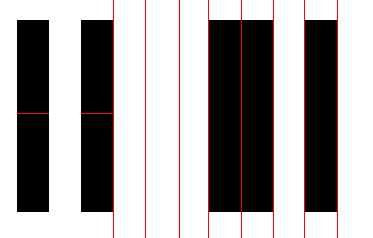
Let's zoom on the beginning of our example code, at the left we have our guard pattern and just after we have the first encoded digit.


After reading the guard, we have the width of a single bit, we can now read the next 7 bits and get their value.
We obtain here space-space-space-bar-bar-space-bar, that is to say we have 0001101, and according to our table it is the value 0.

Here are two more barcode images I used:


I tried with other images as well but you can generate your own barcodes online if you want.

Now read part 2 for the first part of the implementation.

4D Julia Set

The project

During the last school year we had numerous maths courses: theory of distributions, model theory, Lie algebra... For this last course, we were given several projects idea by our teacher, we have chosen to make a 3D representation of the special linear group and of the Julia set.
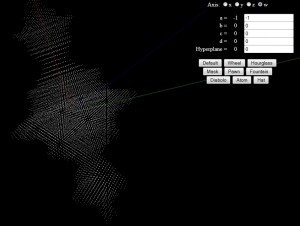
An online representation of the Julia set can be found here.
You can try some presetted values that yielded nice figures or you can mess around with the different parameters (explained in the following section).

Warning:
I recommend using a top notch web browser, if everything is black or you have only a 3D axis, try again with another browser.

This project was my first experiment with Javascript and WebGL using ThreeJS
Using JS was not a requirement for the project, but we thought it would be a good idea to have an online demo !

Explanations

Julia sets are fractals defined by the recurrence relation , with being a constant.
If, for a given , converges, then is in the Julia set.

Julia sets can be represented in 2D (as shown on wikipedia) with ) or in 4D with .
is the set of quaternions, quaternions are hypercomplex numbers of the following form:


With , , being roots of unity, i.e. .

To obtain a representation in a 4D space, each point of this space is represented by a quaternion.
Given a fixed value of , we can compute the corresponding Julia set by testing the convergence of for all points of this 4D space.
In our online demo, the 4 coefficients of the quaternion constant can be modified through the sliders , , and .

We cannot visualize 4D objects, so we need a 3D representation of the Julia set. We have to take a slice of the Julia set, in other words we compute the intersection of the set with an hyperplane.
What this means for our demo is that we assign a constant value to the same coefficient for each quaternion (for example the coefficient associated with ).
The three remaining coefficients will form the three axis of our 3D representation (, et ).
In our online demo we can choose which coefficient should be fixed and modify its value with the slider Hyperplane.

Once we have fixed a coefficient for all quaternions, we iterate through all possible values of , and .
For instance if we have chosen that , the initial value of the sequence is therefore:

Point is in the Julia set (and hence displayed as a white dot) if, after a given number of iterations, the sequence is below a threshold. In our demo we compute 10 iterations.

Project - Optical Character Recognition


Presentation

During my second year at EPITA, the Fooo team has undertaken an ambitious project: a software for Optical Music Recognition (OMR, aka Music OCR).
The project was written mainly in C and OCaml.

Contributions

I was in charge of developing a neural network for character recognition.

As a first attempt I developed a classical multilayer perceptron (MLP).
However the results obtained on the MNIST database of handwritten digits were not good enough. The first major problem of a MLP is its low resilience to shifting, scaling or other forms of distortion. The second major problem is the fact that the geometry of the input image is not taken into account. In order to solve this problem, the input of the MLP is not the raw image but rather the output of a features extractor.

After doing some research on other classification methods and image characterization techniques I decided to implement a simple but efficient variant of MLPs: Convolutional Neural Networks (CNN) introduced by Yann LeCun and Yoshua Bengio in this paper.
The image is divided in several receptive fields, for instance overlapping regions of 5x5 pixels. The second layer is obtained by applying several convolutions on the input image. The values of the convolution kernel are computed during the learning phase of the neural network. The application of a convolution on the input image forms a features map in the subsequent layer. Generally, 4 or 6 features maps are used in the first hidden layer.
The second hidden layer is a subsampling layer, a local average is computed for each value of the previous feature map. Using this technique, the classifier achieves some form of translation invariance.

This convolution/subsampling alternation is used twice before the output layer.
We therefore have this order: input-convolution-subsampling-convolution-subsampling-output.

Using Convolutional Neural Networks we achieved good classification results on the MNIST database. After preprocessing of the input data (for example distortion) we achieved very goods results: around 97% on the test set.

The final report for the project can be found here (in French).
A good explanation on CNNs can be found here.

Project - Fooo

Presentation

Fooo !

Fooo was my very first computer science project. It was developed in 8 months during my first year at EPITA, a french graduate school of computer science and advanced technologies and succeeded in finishing top project of the year.
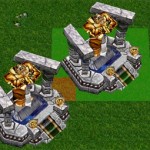
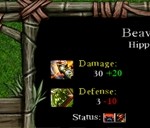
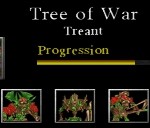
In a team of 4 students (with Christopher Chedeau, Vladimir Nachbaur and Alban Perillat-Merceroz) we developed a Real Time Strategy (RTS) game largely inspired from Warcraft III. However, textures, models and icons were not taken from MDX/MDL/BLP files of this game. Instead we used non-copyrighted fan-made art, with the approval of the authors.

The core of the game was developed in Delphi, the 3D engine was developed with OpenGL and the interface is in Lua.
Source files, reports (in French) and screenshots can be found on our website.

Video

We have made a video presenting all the features of our project, check it out !

Contribution

As mentioned, Fooo was my first large project experience. The project quickly started after being introduced to programming through the functional language OCaml and later Delphi (language inspired by Object Pascal).

Developing a video game from scratch during the first year seems to be rather a daunting project. The policy of our school to help us develop our project was rather simple: there was no such policy. Of course we had general algorithms courses and smaller Delphi project in the meantime but concerning project design, pathfinding, 3D engine, networking... we had to figure most of it by ourselves by reading books, forums, tutorials...

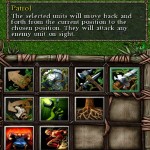
I was mostly in charge of the core of the game: movement, orders (e.g. patrol, attack), spells, resources generation and usage, unit creation, unit death, building creation, etc.
I also contributed to the interface in order to associate each user action (like mouse selection, button click, etc) to an action in the game's engine.